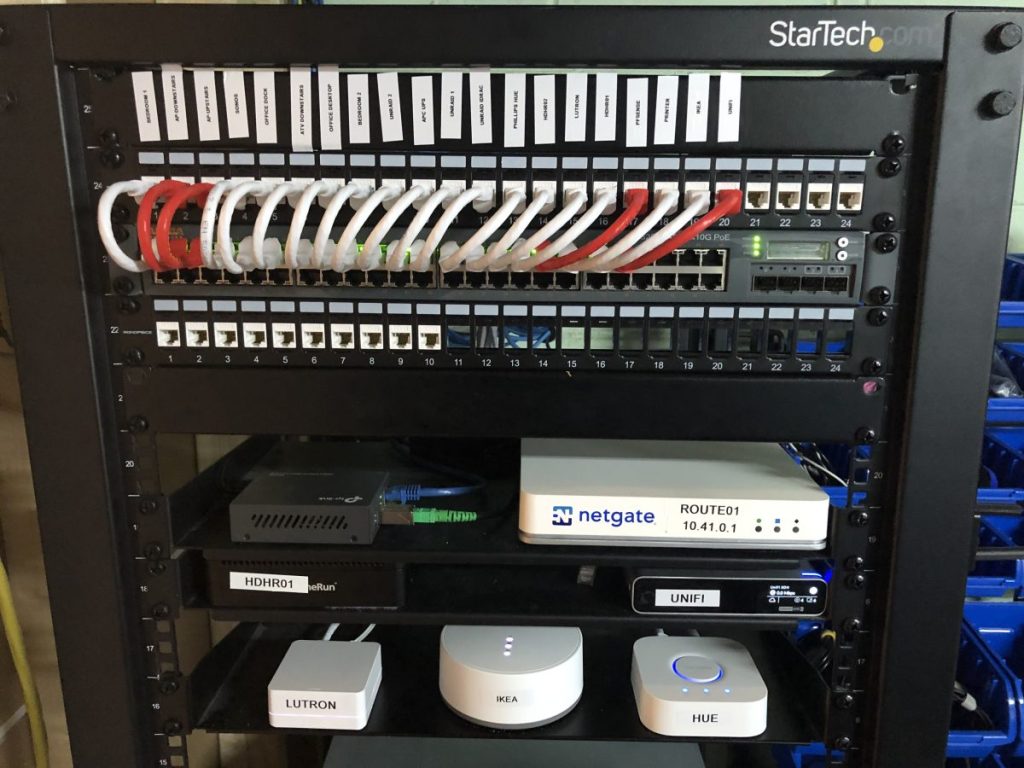
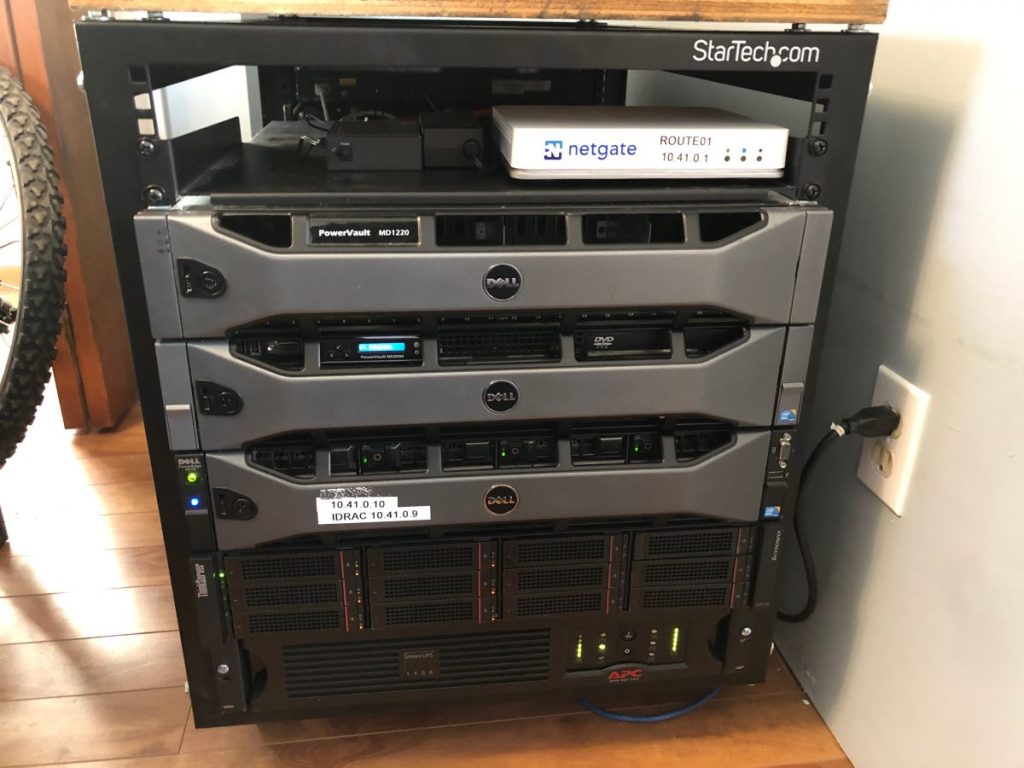
Regardless of how much homelab hardware I try and cram in my basement I’ve accepted that actual datacenters will probably have better uptime than my house.
Every time there’s a storm at my house I sit and watch the airborne fibre optic cable bringing internet to my basement server rack swing in the wind and wonder if this will be the time that it breaks. With that said, so far so good?
I’ve decided that certain “high availability” services need to live somewhere that I don’t have to worry about rushing to replace a failed hard drive, a roasted power supply or a broken internet line. For me, that’s services like WordPress (this blog), NextCloud (file storage), Bitwarden (password manager) and my Ubiquiti controllers (UniFi and UNMS). These are critical to my every day life and I’d be pretty lost if they were down. On the other hand, I can deal with a few days of downtime for services like Plex that run from my basement – my family might say otherwise though…
I had briefly mentioned that I deployed a docker VPS on DigitalOcean in my last post but my one hang-up with their service is their built in backup application doesn’t support nightly backups – that means I could potentially lose a week of data without a different backup solution. I’m using SimpleBackups.io to take nightly snapshots and do offsite DB and file level backups to S3 object storage to get around this as I already had a subscription for another project, but I wanted to write this tutorial in a way that made sense for a home user. SimpleBackups.io is a great service but the base package would be cost prohibitive for a homelab.
So, onward to finding a different solution. I looked at the other VPS providers and decided that VULTR was a better fit for homelab usage. They offer competitively priced VPS packages, have support for nightly backups and a Canadian datacenter – perfect. Linode also looked great and had a nightly backup offering.
Those aren’t affiliate links by the way, my little of the corner of the internet still exists without sponsored posts. 😉
Creating a New VPS
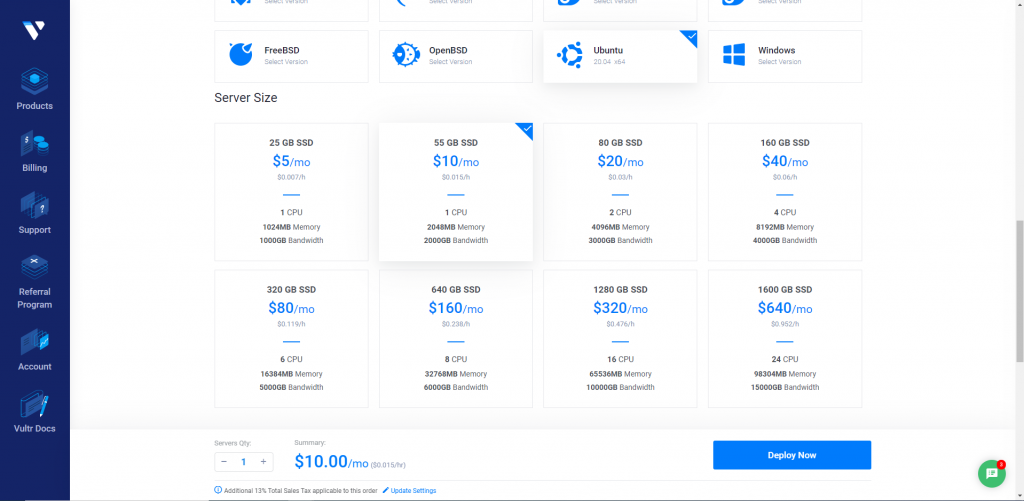
To get started, from the VULTR control panel I deployed a $10/month VPS with 1vCPU, 2GB Memory, 55GB SSD Storage and 2TB Bandwidth. I also selected “enable auto backups” for an additional $2/month and selected my SSH public key for authentication.
If you’ve never done this before, you’ll want to use SSH keys to authenticate to your VPS as simple username/password logins aren’t secure enough for SSH access – it’s sort of like exposing RDP directly to the internet.. Just don’t do it. VULTR has a great article on how to generate a keypair and attach it to your account here.
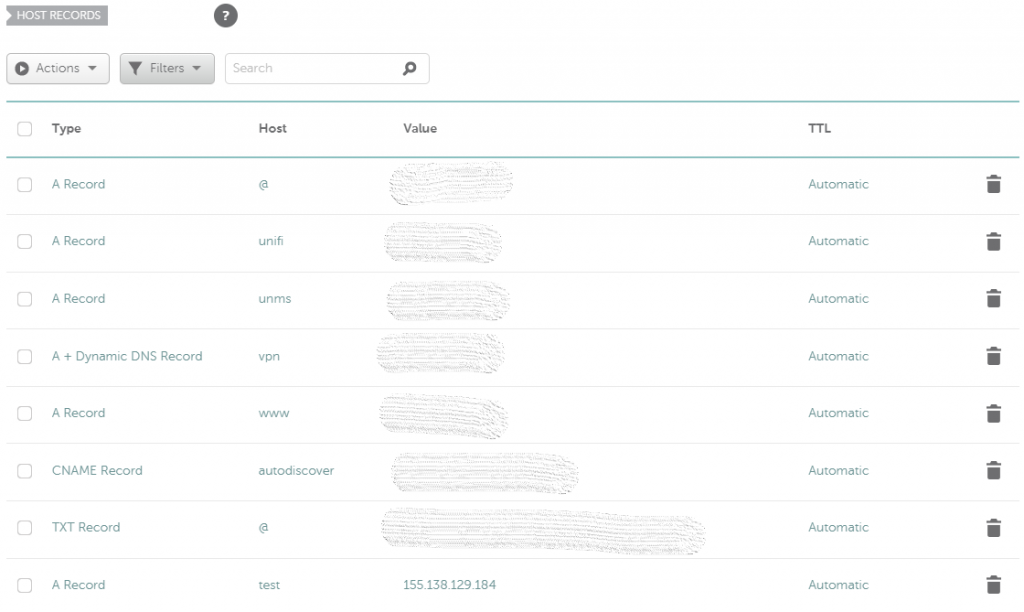
Once the VPS finished initializing I was given a public IP address and was ready to go. First step, off to my domain registrar’s control panel to add a new A record for the host. Since this is a tutorial I’m using a subdomain “test.brown.id” but for the domain root you would simple replace “test” with “@”.
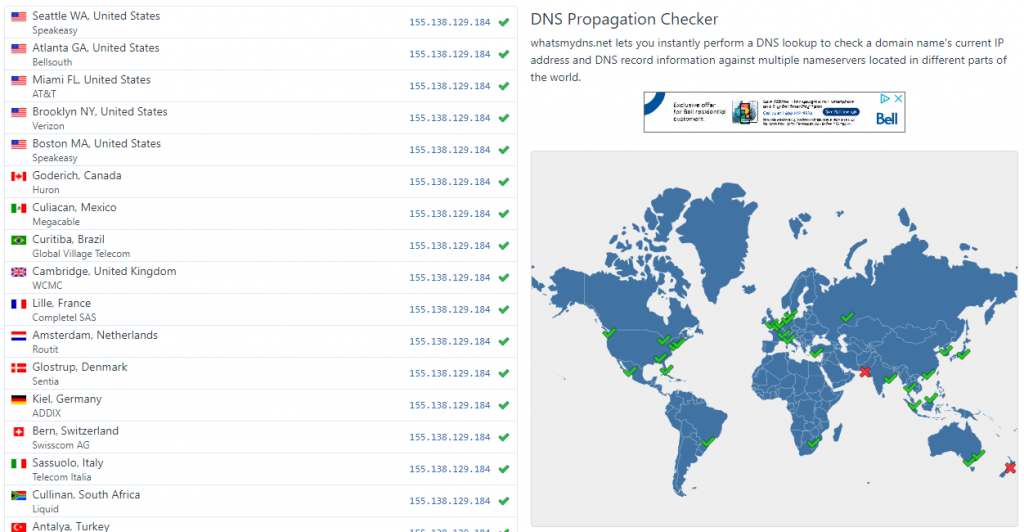
Grab a refill on your coffee (beer?) and give the new DNS record(s) a few minutes to propagate. If you’d like to check how propagation is coming along visit whatsmydns.net.
Initial VPS Setup
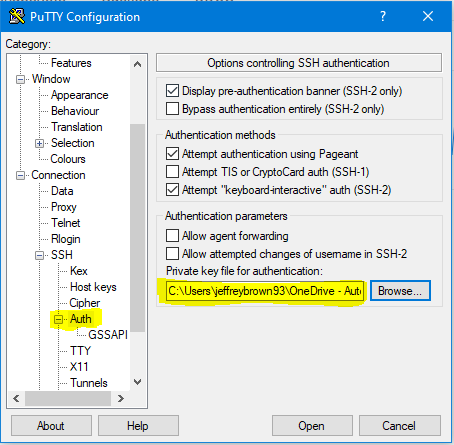
Because I’m a Windows user, I’m using Putty to connect to my new server, but any SSH client will do. Be sure to specify your keypair before connecting.
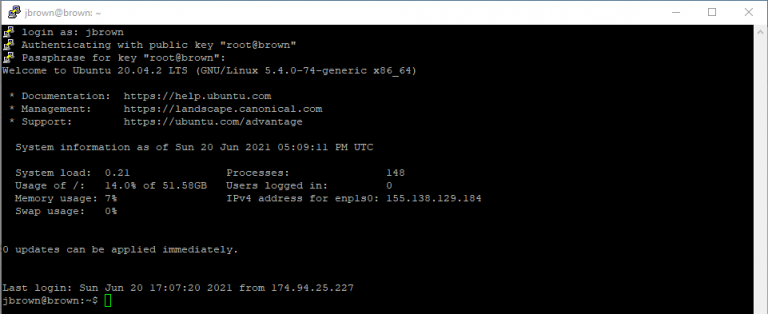
For our first SSH session we’ll be logged in as “root”. Type this in and enter the passphrase for your keypair and you should be in! The first thing you should do with any new VPS is run updates. Since we’re running as root we don’t need to use “sudo” just yet.
apt update && apt upgrade -yNow we’re going to create a non-root user, copy the SSH public key in the root user’s home folder and grant our new user sudo privileges. Replace “jbrown” with the username you’d like to use to manage your system.
adduser jbrownusermod -aG sudo jbrownmkdir /home/jbrown/.sshchmod 700 /home/jbrown/.sshcp /root/.ssh/authorized_keys /home/jbrown/.ssh/authorized_keyschown -R jbrown:jbrown /home/jbrown/.sshchmod 600 /home/jbrown/.ssh/authorized_keysWhile we’re here I’m also going to take a moment to create a swap file – you don’t have to but I consider it a best practice. A swap file is used to store inactive pages when system memory becomes full.
fallocate -l 4G /swapssdchmod 600 /swapssdmkswap /swapssdswapon /swapssdsh -c 'echo "/swapssd none swap sw 0 0" >> /etc/fstab'Now a quick reboot for some of those updates we did earlier:
reboot nowYou will be immediately disconnected from your VPS while it restarts. Give it a brief moment to come back online and let’s login as our new non-root user. Use the same public key file in Putty and instead authenticate with your new username.
We still have a few housekeeping items to look after. First, we will disable root logins now that our sudo user account is up and running.
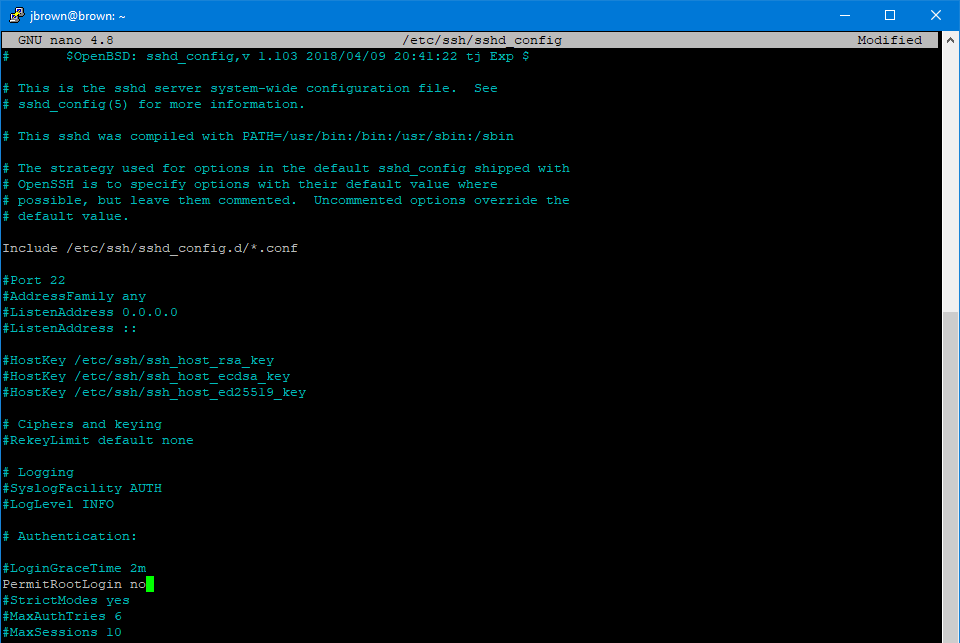
sudo nano -w /etc/ssh/sshd_configScroll down to “PermitRootLogin” and change “yes” to “no”. Press CTRL+X and type “Y” and enter to save.
Reload SSH
sudo systemctl reload sshdLast step in the initial configuration – we’re going to enable the firewall. First, we’ll set a rule to continue letting SSH connections through:
sudo ufw allow 22Then we will enable the firewall:
sudo ufw enableNote that at this point all ports except SSH (22) are closed – as you add services to your docker host that require ports to be opened you can use the same format above to enable them.
Also, it’s worth nothing that SSH is open to the entire internet using the above command – as we’re using an SSH keypair to authenticate this is “ok” but it’d be much better to setup a firewall rule only allowing access from your IP address. Most residential ISPs use dynamic IP addresses (they change) so I’ve left this out, but if you do have the luxury of a static IP at home consider using a firewall rule like this instead:
sudo ufw allow from 0.0.0.0 to any port 22Setting Up Docker – Finally
Alright, enough initial configuration and on to the fun part – we’re going to follow the official Docker guide pretty closely here. First, we’re going to allow apt to use a repository over HTTPS:
sudo apt-get install \
    apt-transport-https \
    ca-certificates \
    curl \
    gnupg \
    lsb-release
Add the GPG key:
curl -fsSL https://download.docker.com/linux/ubuntu/gpg | sudo gpg --dearmor -o /usr/share/keyrings/docker-archive-keyring.gpgAdd the repository:
echo \
  "deb [arch=amd64 signed-by=/usr/share/keyrings/docker-archive-keyring.gpg] https://download.docker.com/linux/ubuntu \
  $(lsb_release -cs) stable" | sudo tee /etc/apt/sources.list.d/docker.list > /dev/null
Update APT:
sudo apt updateInstall Docker Engine:
sudo apt install docker-ce docker-ce-cli containerd.ioInstall Docker Compose:
sudo curl -L "https://github.com/docker/compose/releases/download/1.29.2/docker-compose-$(uname -s)-$(uname -m)" -o /usr/local/bin/docker-composeApply executable permissions:
sudo chmod +x /usr/local/bin/docker-composeNow we need to make a directory for our Docker Compose file and our Docker app data (persistent data stored outside of the image).
mkdir ~/docker-buildmkdir ~/appdataNext, we’re going to create a Docker Compose file. The docker compose file defines all of the services we’re going to run, where the images are stored, where the persistent appdata is going to live and what ports should be opened.
nano ~/docker-build/docker-build.ymlI’ve included an example below to run a UniFi container from the team at LinuxServer.io. You can simply add new containers to the Docker Compose file as you want to spin them up, the only requirement is that you open firewall ports to match any service you want to be externally accessible. For example, we’d also open some combination of 3478, 8080, 8880, 8843, 80 and 443 for a UniFi controller.
---
version: "2.1"
services:
  unifi:
    image: ghcr.io/linuxserver/unifi-controller
    container_name: unifi
    environment:
      - PUID=1000
      - PGID=1000
      - MEM_LIMIT=512M
    volumes:
      - /home/jbrown/appdata/unifi:/config
    ports:
      - 3478:3478/udp
      - 10001:10001/udp
      - 8080:8080
      - 8443:8443
      - 1900:1900/udp
      - 8843:8843
      - 8880:8880
      - 6789:6789
      - 5514:5514
    restart: unless-stopped
A Quick Note on Reverse Proxies
Now is a great time to start the conversation about a reverse proxy. Each VPS you spin up typically comes with one IP address. HTTP/HTTPS run over ports 80 and 443 respectively so.. traditionally that would mean we can only run one service on each IP, right?
This is where a reverse proxy comes in and let’s us get the most out of our $10/month VPS. We can put NGINX in front of all of our services and it will monitor the request URL and direct traffic based on the request. For example, nextcloud.brown.id, bitwarden.brown.id, unifi.brown.id, unms.brown.id and brown.id itself could all run on one VPS with an A record pointed to the same single IP address in the DNS configuration. NGINX will then route traffic to the appropriate container based on the request URL. Cool, right?
I’d recommend using another LinuxServer.io container called SWAG to do this – it’s everything you need packaged up into one nice clean container.
Sample Docker Compose file to deploy SWAG:
---
version: "2.1"
services:
  swag:
    image: ghcr.io/linuxserver/swag
    container_name: swag
    cap_add:
      - NET_ADMIN
    environment:
      - PUID=1000
      - PGID=1000
      - TZ=America/New_York
      - URL=brown.id
      - SUBDOMAINS=www,unifi
      - VALIDATION=http
      - EMAIL=name@email.com
      - ONLY_SUBDOMAINS=false
      - CERTPROVIDER=letsencrypt
    volumes:
      - /home/jbrown/appdata/swag:/config
    ports:
      - 443:443
      - 80:80
    restart: unless-stopped
We’d then simply open ports 80 and 443 in the UFW firewall and all traffic would flow through the reverse proxy. SWAG will also handle creating and renewing LetsEncrypt certificates for your site(s).
Once you’ve finished up your Docker Compose file with the services you’d like to run, you can launch the containers:
cd ~/docker-buildsudo docker-compose up -dTo look at logs for a particular container:
sudo docker logs swag -fStop all containers:
sudo docker stop $(sudo docker ps -a -q)Remove all containers:
sudo docker rm $(sudo docker ps -a -q)Restart a container:
sudo docker restart swagPull Images:
sudo docker pullI’m generally pretty happy administering things from the console but if you’d rather do these types of things from a GUI have a look at Portainer – it’s a management interface for Docker and runs in a container itself.
That should about do it for setting up a Docker host on a VPS – you’ll need to configure the individual services you’d like to run but if you’ve followed along you should have a properly configured machine ready to go!